
Want to add the dream glow effect to your video? Try MovieMator Video Editor to light up your videos and create dreamlike moments with key frames.
Step 1: Open MovieMator Video Editor and load the video/audio/image files. Double-click the program icon to open MovieMator Video Editor.
Step 2: Add the target files to the timeline. Select the target file and click “Insert” button, or drag & drop the target file from your local album to append it to the track on the timeline.
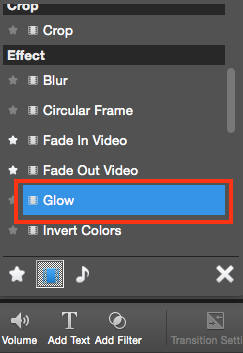
Step 3: Add the “Glow” filter. Select the video and click “Add Filter” to add the “Glow” Filter to the video.
Step 4: Create animated glow effect with key frames. Check “Enable Key Frames” if you want to add animated glow effect. That is to change the glow blurriness from low to high, or from high to low.
Upon checking this option, red keyframe markers will appear at the beginning and the end of the clip.
Slide to change the blur at each key frame. Preview the video and you’ll see the glow changes along with the time.
Please note that a key frame will be automatically added at the playhead when you adjust the glow blurriness of this moment with the option “Auto Add Key Frames” checked.
Step 5: Export your video or save the project for further editing
You could directly export videos with any format for playing on any device. Or save the project and edit them again in your spare time if you have to break off the editing process.

