
By enabling cache, you’ll store your website content that is pulled from a database on the server. So, your website’s response time will be much faster whenever someone visits your site.
To enable caching for your Joomla website, follow this tutorial:
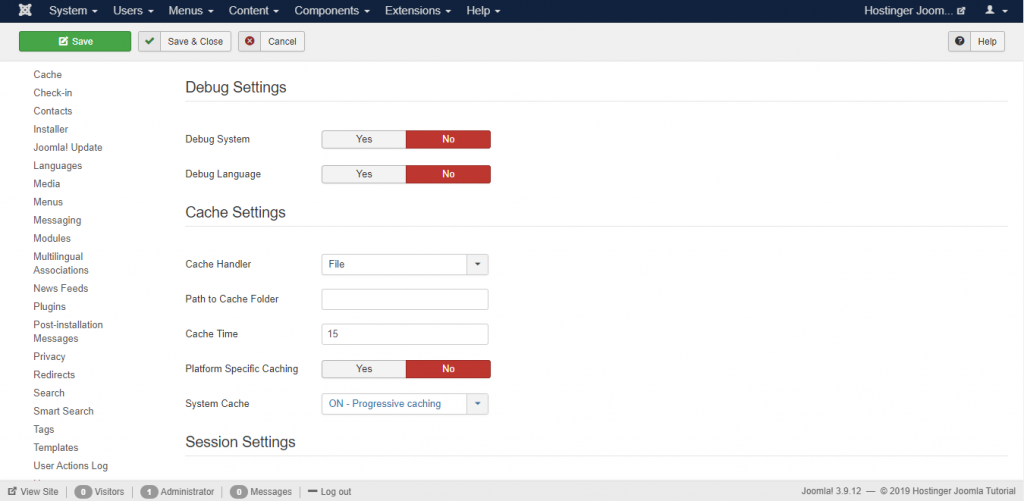
1. Go back to the same Global Configuration section and select the System tab
2. Under the Cache Settings, choose which Cache Handler you want to use. On most shared hosting providers, the File cache handler should be applied.
3. Leave Path to Cache Folder empty, unless you want to save cache files in a custom directory.
4. Cache Time determines how long the cached content stays the same before updating – the default value is 15 minutes.
If you update your website frequently, then you can shorten the cache time value. If you rarely update the website, then you can increase it.
5. Leave Platform Specific Caching as No, unless you provide different HTML content on mobile devices.
6. Turn on System Cache by selecting one of the two options available.
Select the Conservative Caching option if you have an extremely large website. Otherwise, choose the default Progressive Caching option that is best suited for most Joomla sites.
7. Save your changes.
Using Cache Plugins
Another way to enable caching is by turning on the cache plugin.
1. Go to Extensions > Plugins.
2. Find the Page Cache plugin through the search field.
3. Click the button in the Status column to enable it.
4. The button beside the plugin should appear with a green checkmark.
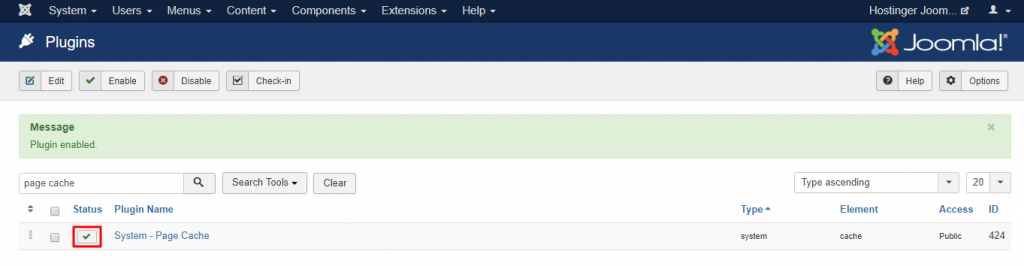
Now your website loading speed should improve.